Friday, June 14, 2013

THREE- Thrift Store Candleholder

I'm always searching local thrift stores for items with good bones in desperate need of an update. Just because something has had a rough past doesn't mean that it can't have a new beginning. Have you heard of Jesus?!?

One of my recent finds was a candleholder found at Salvation Army for $2.99. Outdated and a bit battered but full of potential.


First step was to remove those darling little legs. While they could have stayed, I was going for a cleaner look on this piece.


I did however save them for a future whim of inspiration.


There were a few spots on this piece that needed patching. Probably from being tossed into a donation bin or some other wild adventure.


Nothing that a tube of wood filer couldn't fix. I used Minwax's Stainable Wood Filler so I wouldn't have to worry about priming.


Follow directions on the tube and be sure to mound the filler a bit higher than the areas you are filling. You will sand the excess down later.


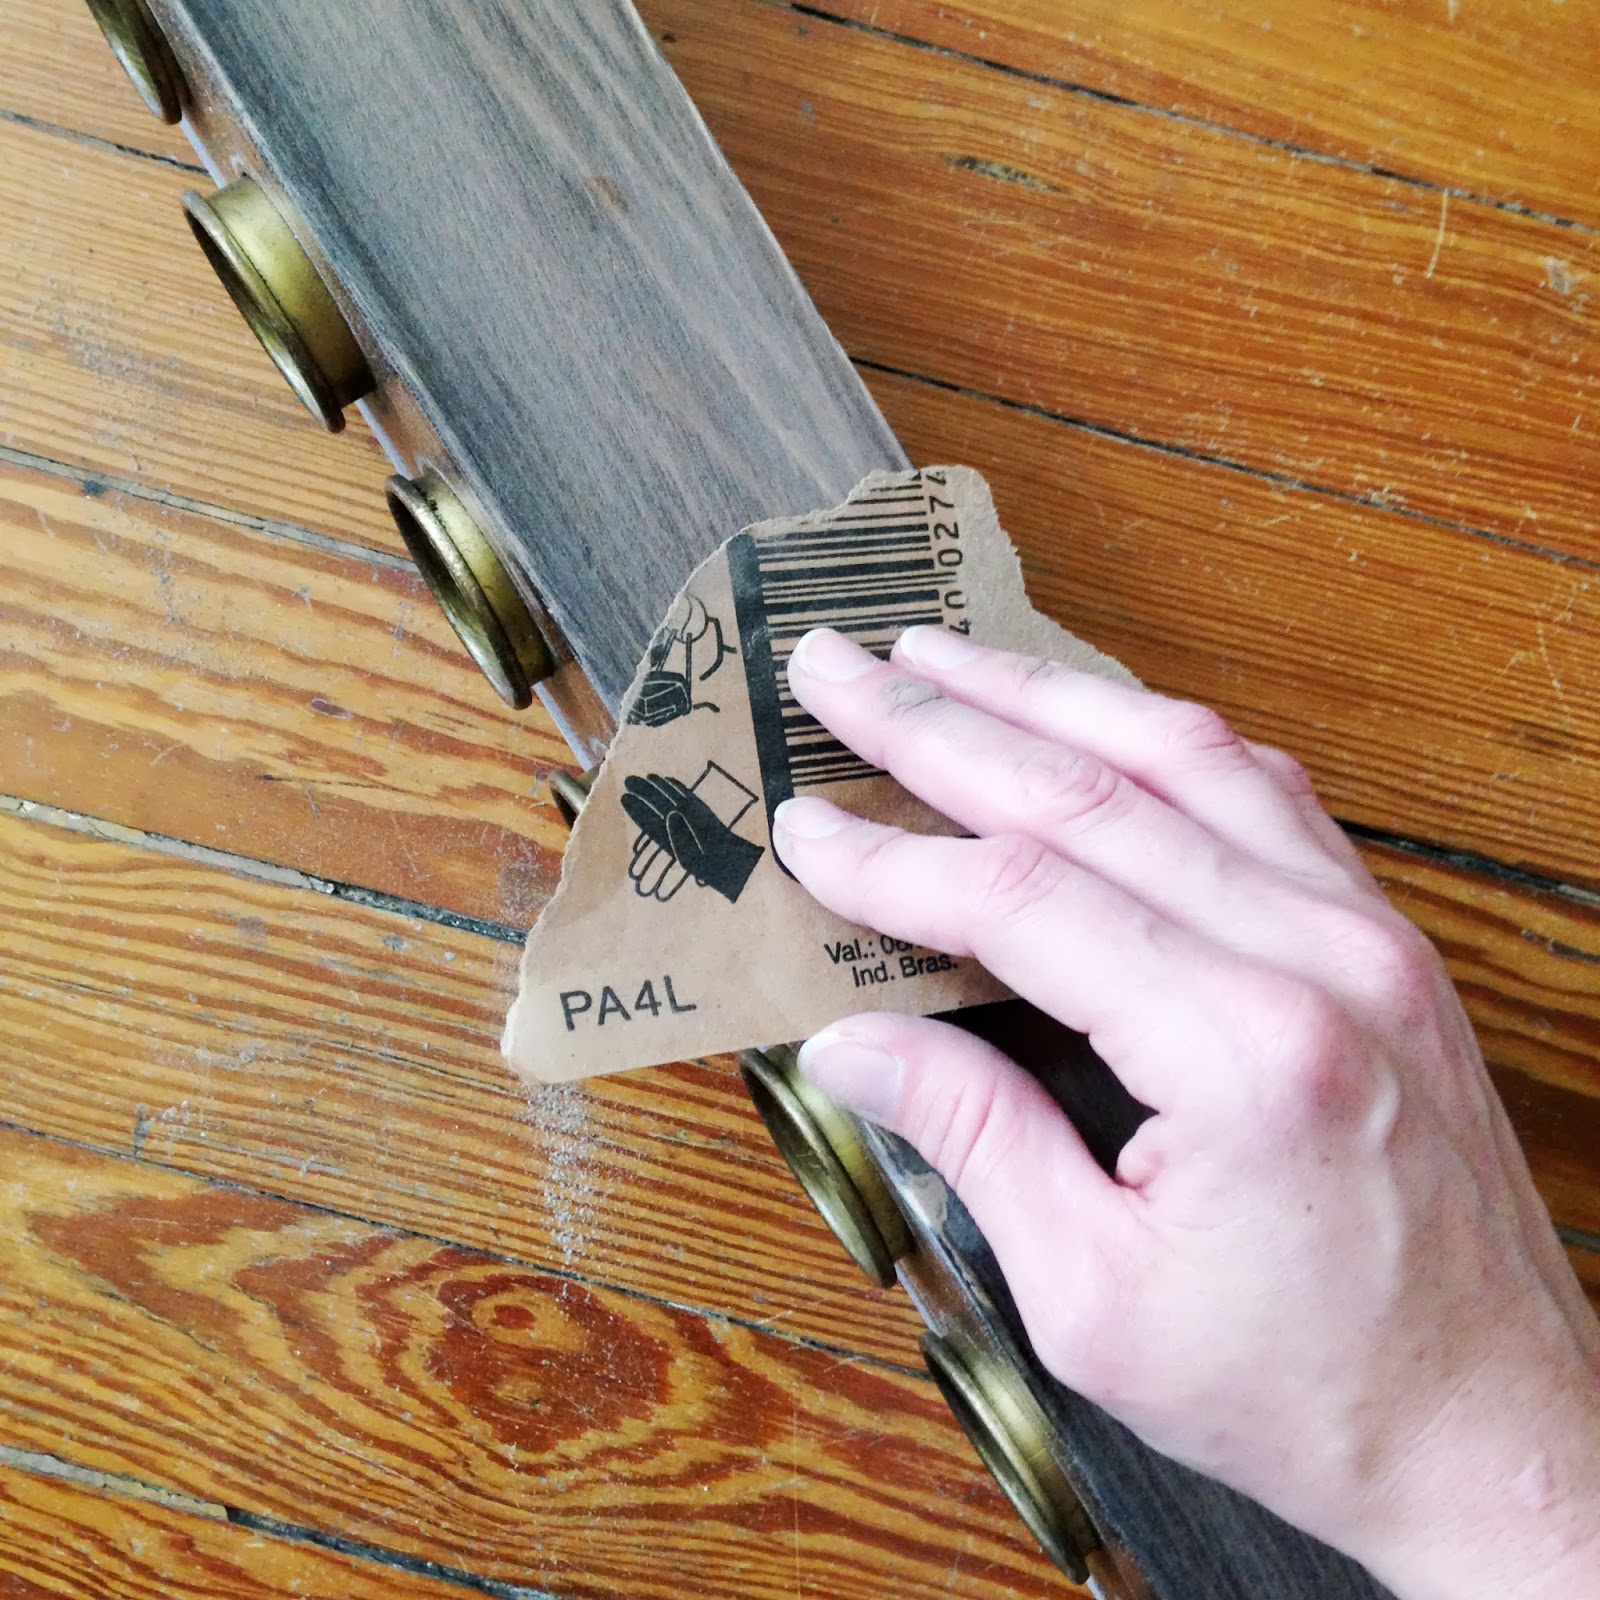
Let dry for 24 hours and then sand smooth going with the grain of the wood. 


You always want to give anything you are going to spray paint a quick once-over with fine grain sand paper. It gives the paint something to adhere to and gets rid of any stray particles on the objects surface.


I love the brass votive holders on this piece so I gently pried them up a bit with a thin flathead screwdriver.


Tape them off with painter's tape and you're ready to head outside to paint!


I choose Krylon's Catalina Mist. Probably one of my favorite colors because it reminds me of the beach and the soft seaside decor of Florida's beach homes. Be sure you are in a well ventilated area and that it's not too humid outside. Rainy days are not good for spray painting. It results in tacky paint and rough layers. Choose a dry, sunny day.


Be sure to let each coat of paint dry completely before the next. Have drips? Gently sand them down between coats.


Remove the tape when done and find the perfect spot to put your new creation!


I choose our front porch. It's perfect for our southern summer nights spent watching our neighborhood buzz with kids and passerby.


And there you go! Project THREE complete! 

What are you creating?!?! Join the fun on Instagram with #ONproject13!

Blessings, Sarah

Monday, June 3, 2013

TWO- Fireplace Revamp

Our fireplace has been in desperate need of a facelift. This is what it has looked like since J bought our house a few years ago. 

This lovely flame bearing beauty has attended every small group meeting in our house. Surprisingly no one said anything about her attire.


The first step in this project involved some grit. And by grit I mean a whole house full. 

Tip: Always make sure your Shop-Vac filter is properly attached before vacuuming out fine dust into your house. Someone (ah-hem) may have not done this. Thankfully I realized it only minutes into vacuuming.


If you have an old house like me the next step is crucial. To clean old bricks you must very careful. Harsh chemicals can break down the fragile comments of the bricks causing them to crumble apart. The mortar between these bricks may be sensitive as well. I suggest a soft bristled brush and some highly diluted soap & water. After your first sweep over them go back once more with a clean batch of water to remove any excess soap that may still be on them. Here's mine post clean. Still not perfect but what is after 90 years?


Under all the grime I discovered that the bricks used to construct our chimney were produced in Warrior, Alabama. 


The red tile missing from the front is another project for another day but for now I cleverly disguise it with the cast iron grate that was there before.


I give the cast iron casing a good wipe down. It is filled with French fleur-de-lis patterns.


A few old books that I had laying around from our wedding placed with their pages facing outwards help give the height I need for a few antique plates and pillar candles also left over from our nuptials.


I love the mix of old graphic patterns with a slight touch of metallic.


And, there you go! Ready for us to enjoy on quiet evenings! 


Enjoy & blessings!

Sarah

Thursday, May 16, 2013

ONE-Old Sign Letters

My husband will attest to my collection of mini collections & love for the old & unique.
Bottles, ball jars, vintage saucers, books... and old sign letters are among a few of these collections.

I like the bold, graphic lines used on storefront signs and being exposed to nature's hand adds even more allure & character. Businesses come and go thus leaving a graveyard somewhere (or so I imagine) of a hodge-podged alphabet.

A quick trip to Atlanta this past weekend & I met a man who owned such a place. A warehouse that once housed his apparel company now houses an ever growing collection of old letters from local businesses long gone. His booth at Scott's Antique Market was jaw dropping.


I have had in mind to do something over our bed with old letters but hadn't found the right ones. 
I started piecing together letters until I came up with this...


And I LOVEd it! 

So I hauled it home & devised a clever way to hang such an odd arrangement.

1. Find that old roll of Christmas wrapping paper that you don't really care for but has those nifty grid lines on the back. 


2. Layout your letters using the lines as guides to keep them straight. Once you have them perfectly placed, trace around each letter. Them remove letters & mark where nails would need to go in order for the letter to hang right on the wall.


3. Tape the paper to the desired spot on your wall. Move it around to find the best placement. Then nail right through the paper at the previously marked spots. 


4. Rip off paper & hang letters. Then step back & admire your handiwork!


Want to join in the fun? I'd love to have you join me! Just post your projects on Instagram using #ONproject13! 

30 projects in 2013!

Now go create something of your own!

Blessings, Sarah

What is ONproject13?

Welcome to ONproject13! 

What is ONproject13 you ask?


I love taking the old & making it new. It's a concept that I feel is at the center of so much of what I do & believe. From a neglected treasure from days past to a life full of shame & regret. All things (and people) can be made new. 

This is my journey of creativity & I invite you to join in or just enjoy it with me!

30 items in 2013! It's gonna be fun!

Blessings, Sarah